
Learn how to create a moodboard for new home design that guides your renovation. Discover essential tools and tips to achieve your dream space!


A moodboard is a curated visual reference that captures the atmosphere, colour palette, and style direction for your new home before a single tile is laid or a piece of furniture is ordered. Think of it as your design’s North Star: every decision you make later, from flooring to lighting, gets measured against it. Tools like Canva, MoodBoardAI, and Adobe Illustrator make the process accessible to anyone, whether you are a first-time BTO owner in Tampines or renovating a resale flat in Katong. When you create a moodboard for your new home design, you give yourself and your renovation team a shared visual language that prevents costly misunderstandings.
What tools do you need to create a new home design moodboard?
The right platform determines how quickly your ideas take shape. Digital tools are the clear choice for most Singapore homeowners because they are easy to share with interior designers, family members, and renovation contractors.
Digital platforms worth knowing:
- Canva offers drag-and-drop templates specifically for interior moodboards, with a free tier that covers most needs.
- MoodBoardAI uses AI to suggest complementary images and colour palettes, which speeds up the inspiration phase considerably.
- Adobe Illustrator gives you precise control over layout and typography, making it the preferred choice for design professionals.
- Planner 5D lets you build a rough 3D floor plan alongside your moodboard, which is particularly useful for visualising how furniture fits within your actual room dimensions.
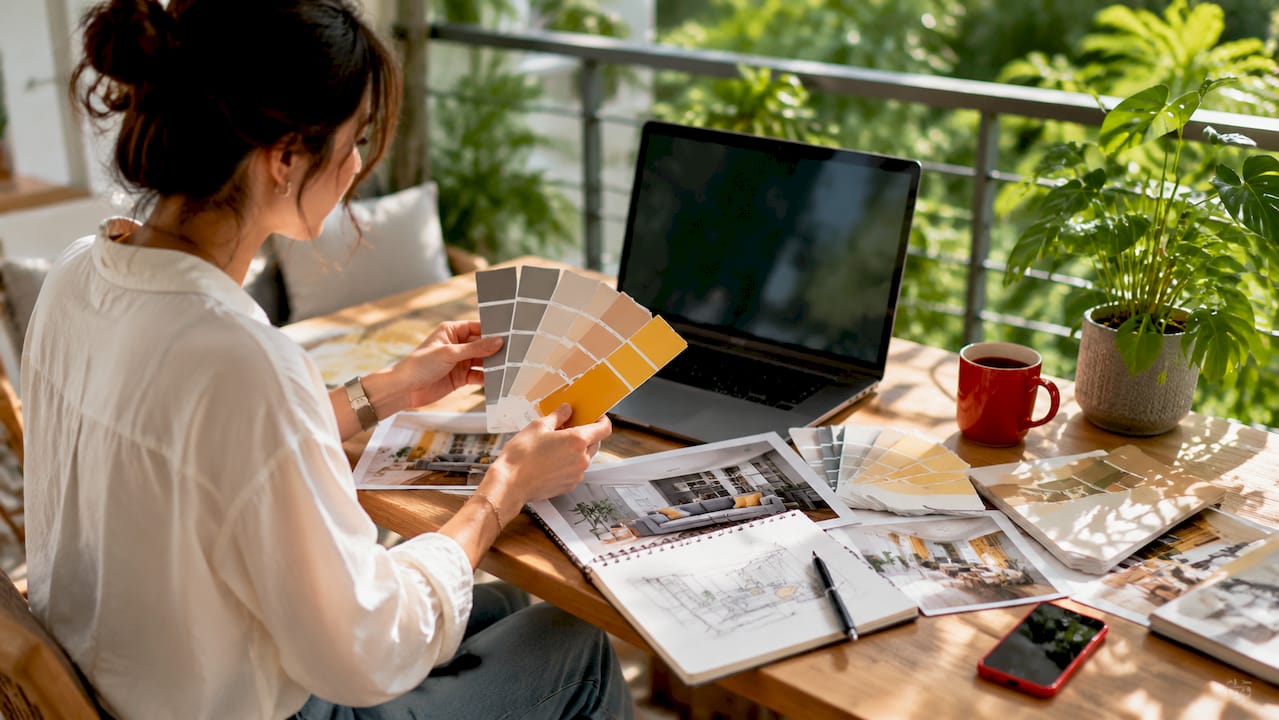
Physical moodboards, assembled from magazine clippings, fabric swatches, and paint chips, still have genuine value. They let you feel textures and compare real paint colours under your home’s specific lighting conditions. The practical limitation is that physical boards are harder to share and revise.
Gather these assets before you start: photographs of your actual space, colour swatches from paint brands like Nippon Paint or Dulux, fabric samples, and specific product images from retailers. Real product images are far more useful than generic AI-generated scenes because they confirm that a piece actually exists, has a real price, and can be sourced locally.
Pro Tip: Use a free background-removal tool like Remove.bg to cut product images cleanly from their original backgrounds before placing them on your board. This keeps the layout looking polished without requiring design software skills.
How do you define the core mood and style direction?
Defining your mood before you collect a single image is the step most homeowners skip, and it is the one that causes the most confusion later. 3–5 descriptive phrases ground your design process and keep every future decision aligned with your actual intentions.
Follow this sequence to set your direction clearly:
- Write your mood words. Choose 3–5 specific adjectives that describe how you want your home to feel. “Calm, airy, warm, natural, and uncluttered” is a direction. “Nice and modern” is not.
- Select your anchor colours. Limit yourself to 2–3 anchor colours to avoid visual noise. In Singapore’s bright tropical light, warm neutrals like sand, warm white, and terracotta tend to read beautifully indoors.
- Identify your anchor piece. Choose one hero item, typically your sofa, dining table, or a statement rug, and build your palette and material choices around it. This prevents the common problem of collecting beautiful items that clash with each other.
- Test your direction against your space. Hold your chosen colour swatches against your walls in both natural and artificial light before committing.
“A moodboard is not a collection of things you like. It is a collection of things that belong together in the same room.” — Kraft & Carat
This distinction matters enormously. Many homeowners fill their boards with images they admire individually but that pull in completely different stylistic directions. Discipline at this stage saves hours of indecision during the renovation itself. For guidance on how a design concept board differs from a simple inspiration collage, Tspacemall’s blog covers the distinction clearly.
How do you gather, curate, and organise your moodboard images?
The most common mistake in building a home decor moodboard is treating image collection as the finished product. Distinguishing inspiration from design decisions saves hours of indecision and wasted effort. A structured three-pass process solves this problem directly.
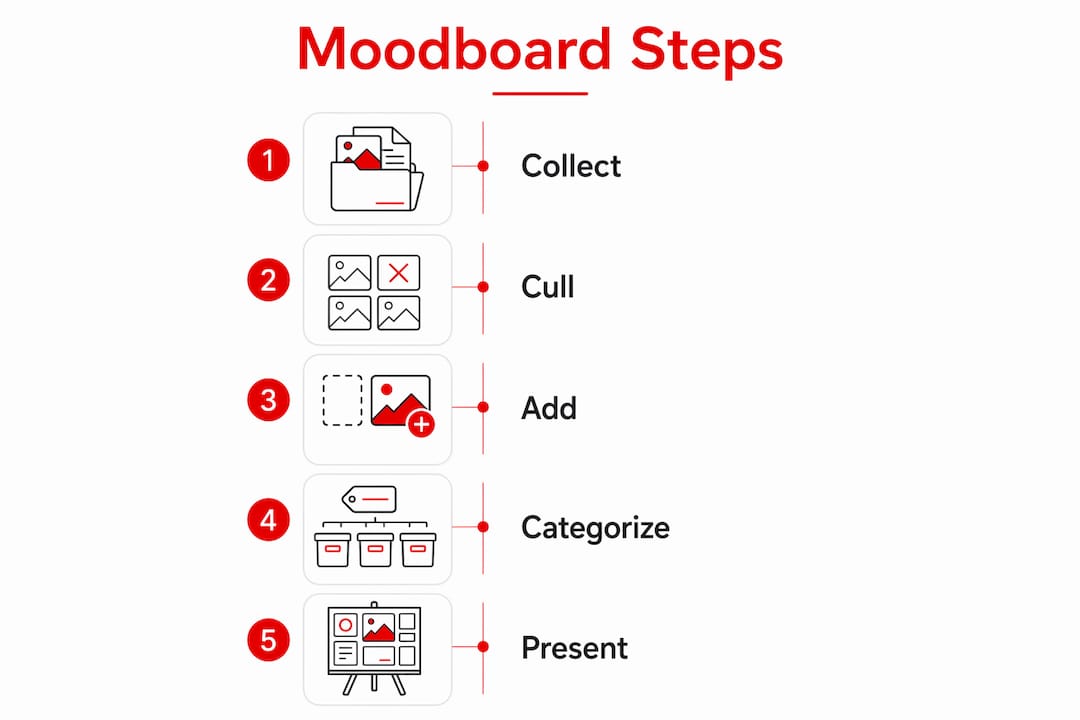
Pass One: Collect broadly.
Spend 20–30 minutes gathering images without filtering. Pull from Pinterest, brand websites like IKEA or Castlery, and Tspacemall’s own portfolio pages. Include both atmospheric shots and specific product images. Photograph your actual room at different times of day and note any trouble spots, such as a dark corridor, a low ceiling, or an awkward column. Including your room’s photos and measurements grounds your moodboard in practical reality rather than fantasy.
Pass Two: Remove what does not fit.
Go through every image and ask one question: does this belong in the same room as my anchor piece? Remove anything that conflicts with your 3–5 mood words, anything you cannot realistically source in Singapore, and anything that ignores your room’s actual constraints.
Pass Three: Add only what aids execution.
In this final pass, add images that make the renovation easier to execute. This means specific product shots with model names, material close-ups like timber grain or stone texture, and lighting references that match your ceiling height.
Organise your final selection into clear categories:
- Palette: colour swatches and paint references
- Materials: flooring, wall finishes, fabric textures
- Furniture silhouettes: the shapes and proportions you want, not just specific products
- Lighting: pendant styles, colour temperature references
- Atmosphere: one or two lifestyle shots that capture the overall feeling
Categorising images early into these buckets prevents clashes in the final design. An effective moodboard contains between 15 and 25 images and can be assembled in under one hour once your direction is clear. That constraint is a feature, not a limitation. It forces you to keep only what genuinely serves the design.
Pro Tip: Set a timer for each pass. Give yourself 25 minutes to collect, 15 minutes to remove, and 10 minutes to add. The time pressure stops you from overthinking and keeps the board focused.
How do you present your moodboard for maximum clarity?
Layout and visual hierarchy determine whether your moodboard communicates clearly or simply looks busy. A well-presented board lets your interior designer or renovation contractor understand your vision at a glance.
| Layout Style | Best For | Key Characteristic |
|---|---|---|
| Minimalist grid | Scandinavian, japandi, or quiet luxury styles | Equal-sized cells, generous white space |
| Organic modern | Eclectic or layered interiors | Overlapping images, varied sizes |
| Annotated flat lay | Working with contractors or designers | Labels, measurements, and material codes included |
Principles that make any layout work:
- Size reflects importance. Your anchor piece, whether a sofa or a hero tile, should occupy the largest area on the board. Secondary items like cushions or accessories should be noticeably smaller.
- Negative space is not wasted space. Crowding images together makes the board harder to read. Leave breathing room between elements, particularly around your palette swatches.
- Group related elements. Place your colour palette adjacent to the materials it will appear on. Put your lighting reference near your ceiling or wall finish.
- Add brief labels. Note the brand, material name, or finish for key pieces. “Oak veneer, warm white stain” tells your contractor far more than an unlabelled wood image.
In Canva, use the gridlines and alignment tools to keep spacing consistent. In MoodBoardAI, the background colour options let you test whether your palette reads better against white, grey, or a dark tone. For Singapore’s compact HDB and condo spaces, a clean, well-spaced board also helps you spot where your chosen pieces might feel too heavy or too large for the room. Tspacemall’s guide on small space décor styles is worth reading alongside this step if your home is under 90 square metres.
What are the common mistakes to avoid in your moodboard?
Even experienced homeowners fall into predictable traps when building their first stylish home moodboard. Knowing these pitfalls in advance saves you time and prevents renovation regret.
- Treating the board as a random collage. A moodboard visualises an atmosphere and a design direction, not a random collection of things you find attractive. Every image must earn its place by serving the overall direction.
- Ignoring real dimensions. A sofa that looks perfect in a showroom photograph may overwhelm a 3-metre living room wall. Always cross-reference your chosen furniture silhouettes against your actual floor plan.
- Prioritising aesthetics over function. A marble-effect floor might look stunning on your board but feel punishingly hot underfoot in Singapore’s climate. Material choices need to account for tropical conditions, maintenance requirements, and daily use.
- Collecting too many images. More images do not mean more clarity. Keeping your board to 15–25 images maximum forces you to make real decisions rather than deferring them.
- Confusing the moodboard with a shopping list. Your board sets the direction. The specific products you buy may differ from the images on it, and that is entirely fine.
Pro Tip: Share your moodboard with one person who will give you honest feedback, ideally someone who knows your home’s layout. Fresh eyes catch mismatches between your board’s mood and your actual space far faster than you will after staring at it for hours.
Key takeaways
A focused, well-structured moodboard is the single most effective tool for translating your home design vision into a renovation your contractor can actually build.
| Point | Details |
|---|---|
| Define mood words first | Choose 3–5 specific adjectives before collecting any images to keep your direction consistent. |
| Limit your colour palette | Stick to 2–3 anchor colours to avoid visual noise and maintain cohesion across rooms. |
| Use the three-pass process | Collect broadly, remove what conflicts, then add only images that aid practical execution. |
| Cap your image count | Keep the final board to 15–25 images so it remains a decision tool, not a wish list. |
| Ground it in reality | Include real room photos, measurements, and locally available products to make your board actionable. |
Why i think most singapore homeowners build their moodboard backwards
From years of watching homeowners navigate renovation projects, I have noticed a consistent pattern: most people start with images they love and work backwards to a concept. The result is a board that looks beautiful in isolation but falls apart the moment it meets a real room with a low ceiling, a structural column, or a budget that does not stretch to Italian marble.
Singapore homes present specific constraints that generic moodboard advice does not address. The humidity affects material choices. The compact footprint of most BTOs and condos means that visual weight matters enormously. A dark, moody palette that looks extraordinary in a London townhouse can make a 70-square-metre flat feel like a cave.
My honest recommendation is to start with your room’s photographs and measurements before you open Pinterest or Canva. Let the space tell you what it needs. Then build your mood words around what the room can realistically support. Iterate the board at least twice, and get your partner or family involved in the second pass. People who live in the space daily notice practical problems that pure aesthetics miss.
The other thing I would say is that a moodboard is most powerful when you bring it to your interior designer or renovation contractor at the very first meeting. It replaces a thousand words of description with a single visual reference. Designers at firms like Absolook Interior Design or Woodcraft Interior Design will immediately understand your direction and can flag conflicts with your budget or building regulations before work begins. That conversation, grounded in a clear board, is where good renovations start.
— Jonathan
Bring your moodboard to life with tspacemall’s design experts
Your moodboard is the beginning, not the end. The real work is finding the right team to translate that vision into walls, floors, and furniture that feel exactly as you imagined.
Tspacemall brings together a curated selection of Singapore’s trusted interior design firms, renovation contractors, and home décor specialists, all under one roof in the East. Whether you are working with Absolook Interior Design for a full home transformation or exploring options with Woodcraft Interior Design for bespoke carpentry solutions, you can browse portfolios, compare styles, and connect directly with professionals who understand Singapore’s unique homes. Visit Tspacemall and take your moodboard from the screen to the space you actually live in.
FAQ
What is a moodboard in interior design?
A moodboard is a curated visual collage that captures the colour palette, materials, furniture style, and atmosphere for a room or home. It acts as a reference guide for all design and purchasing decisions throughout a renovation project.
How many images should a home design moodboard contain?
An effective moodboard contains between 15 and 25 images. Keeping the count within this range ensures the board remains a focused decision tool rather than an overwhelming inspiration dump.
What is the difference between a moodboard and a shopping list?
A moodboard visualises an atmosphere and design direction, not a literal list of items to purchase. The specific products you buy may differ from the images on the board, as long as they serve the same mood and style.
Which free tool is best for creating a home moodboard?
Canva is the most accessible free option for most homeowners, offering drag-and-drop templates and easy sharing. MoodBoardAI is worth exploring if you want AI-assisted colour and image suggestions to speed up the curation process.
How do i make my moodboard practical for a singapore home?
Include real photographs of your room, note its dimensions and any structural constraints, and choose materials suited to Singapore’s humidity and tropical light. Balancing aesthetic appeal with practical constraints is what separates a professional moodboard from a casual collage.
Recommended


